
Note: Once a user in an organisation integrates BGL CAS 360, it does NOT integrate the other users in the organisation as it goes against BGL CAS 360 Security requirements. Users under an organisation need to connect their BGL CAS 360 accounts individually.
In our LYD portal (surge) you will find the client success team and organisation support chats, quick links, product services and partner benefits.
- Go into the document wizard
- Then into my integrations (we currently have 3 available)
- To integrate BGL CAS 360 - click on the connect to BGL CAS 360 button.
- See below article for more information:
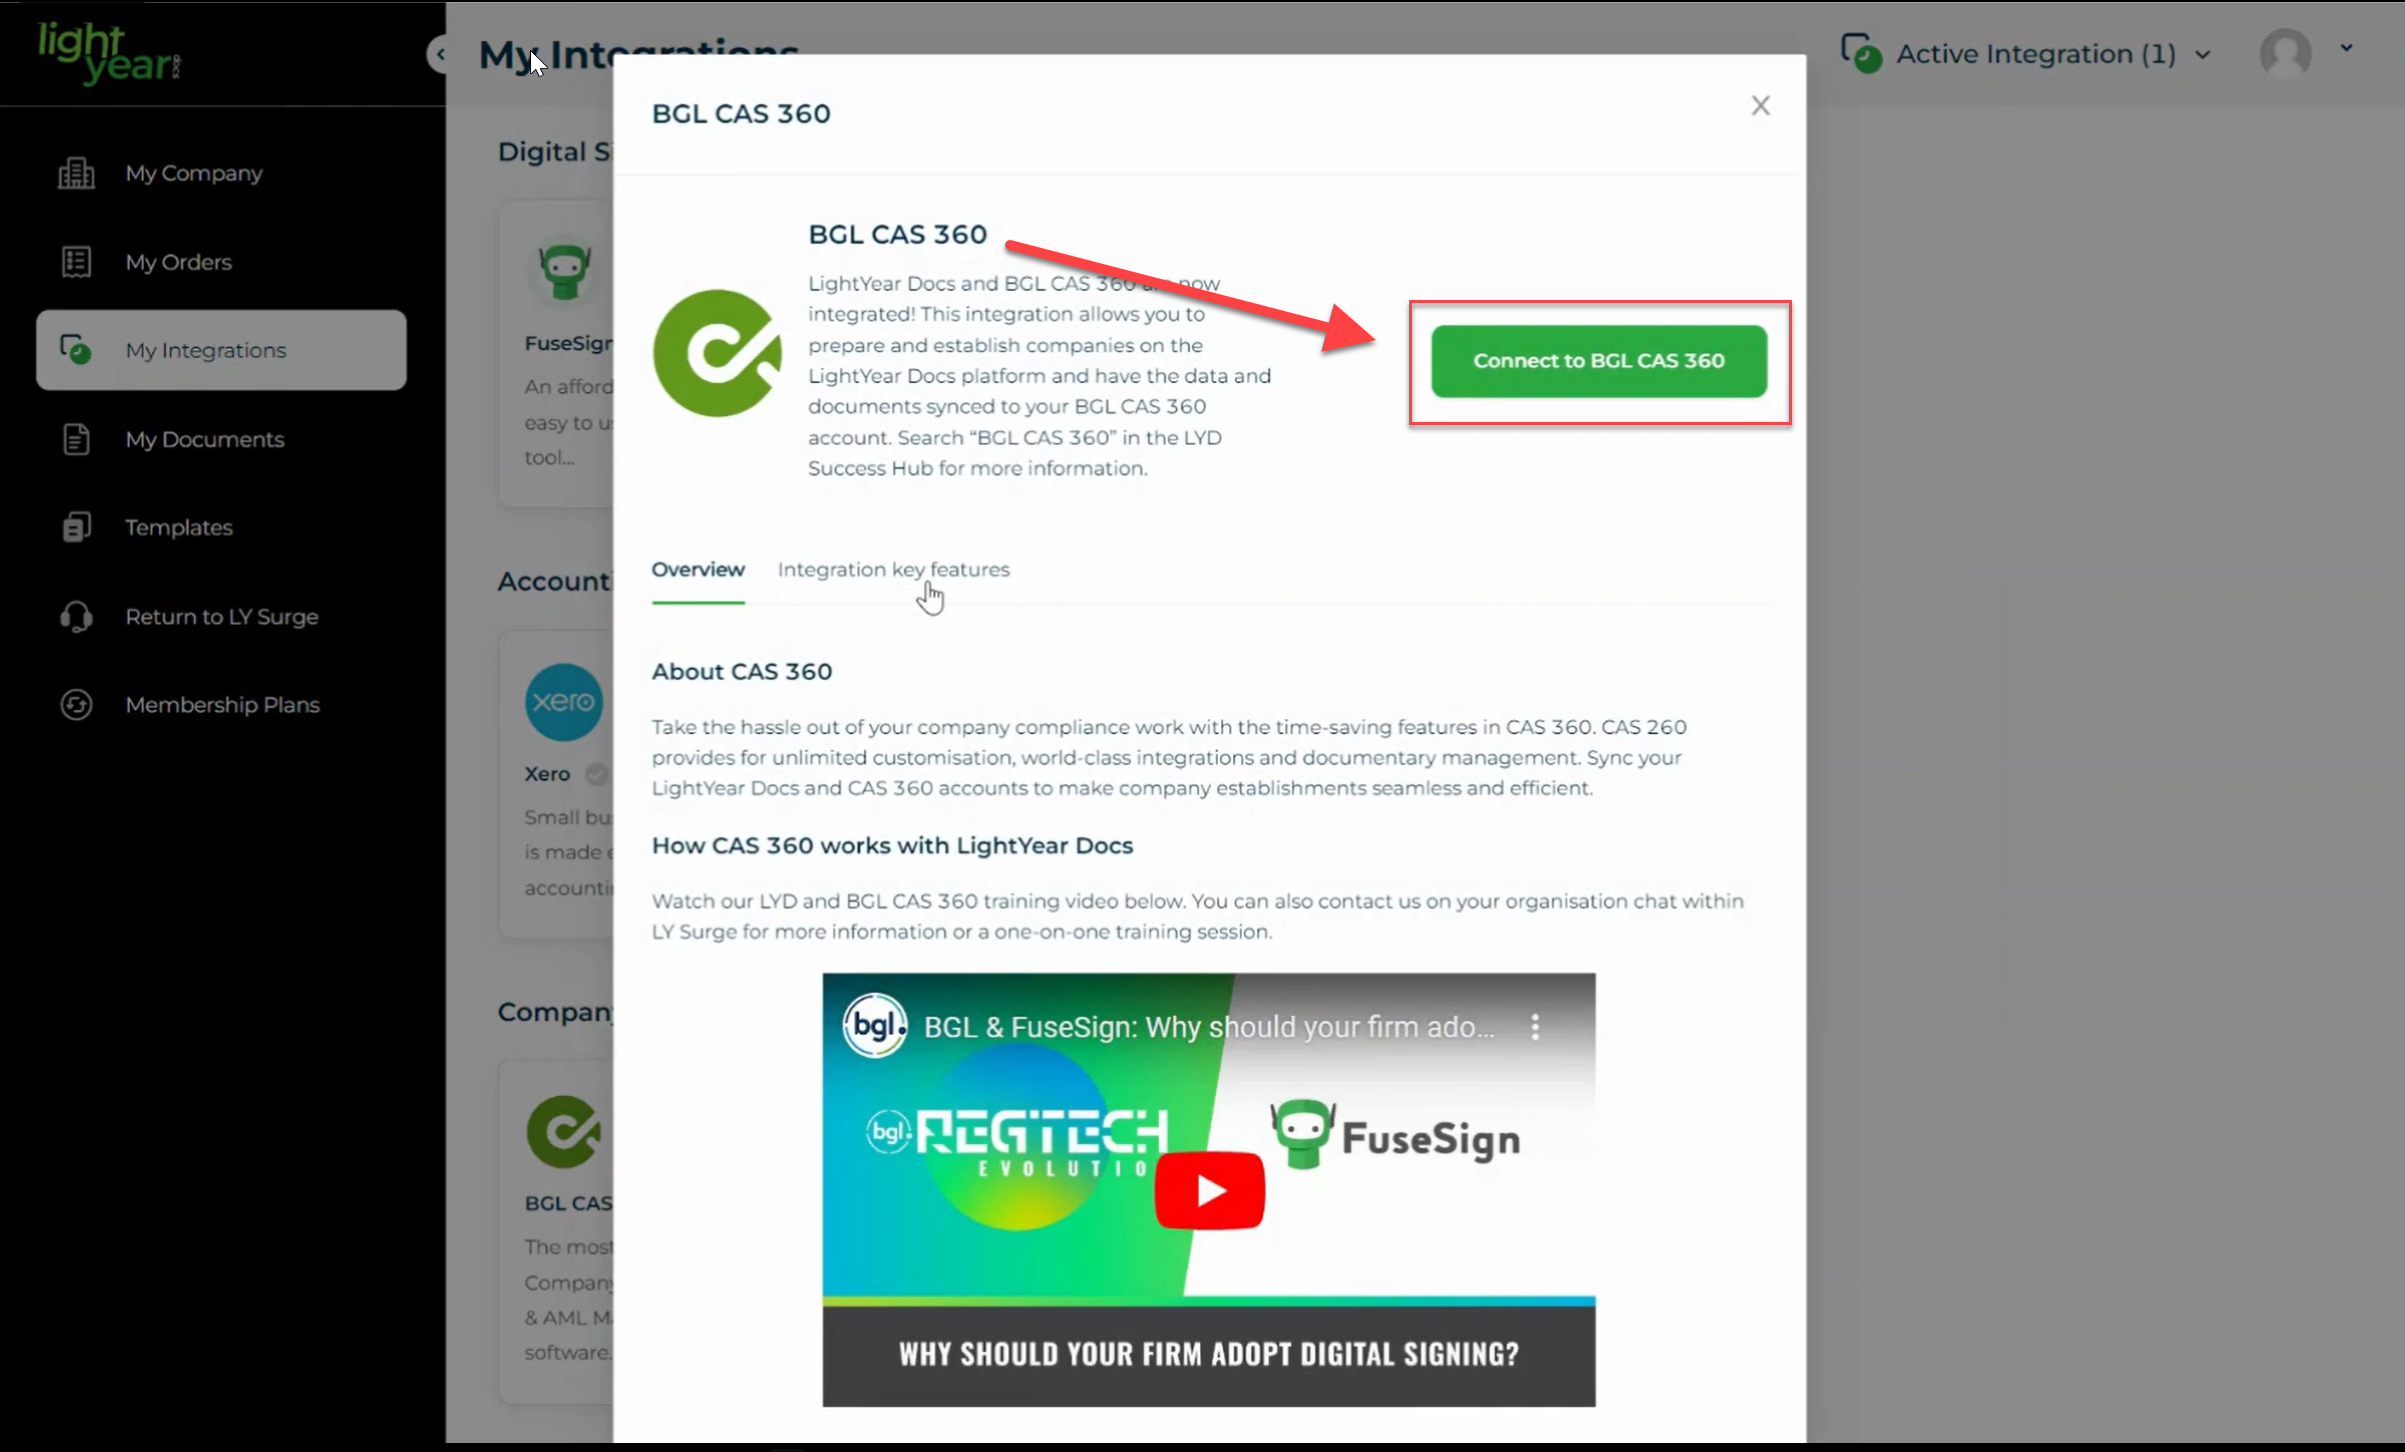
- Log in and use the authentication through CAS 360. You will also have a green tick next to your CAS 360 account under integrations once it have been connected, as well as in the top right corner it will show the BGL CAS 360 logo to show it has been connected.
My Templates
- All the documents that do have the BLG CAS 360 integration will have the CAS 360 logo on it (eg. Company Establishments - see below)
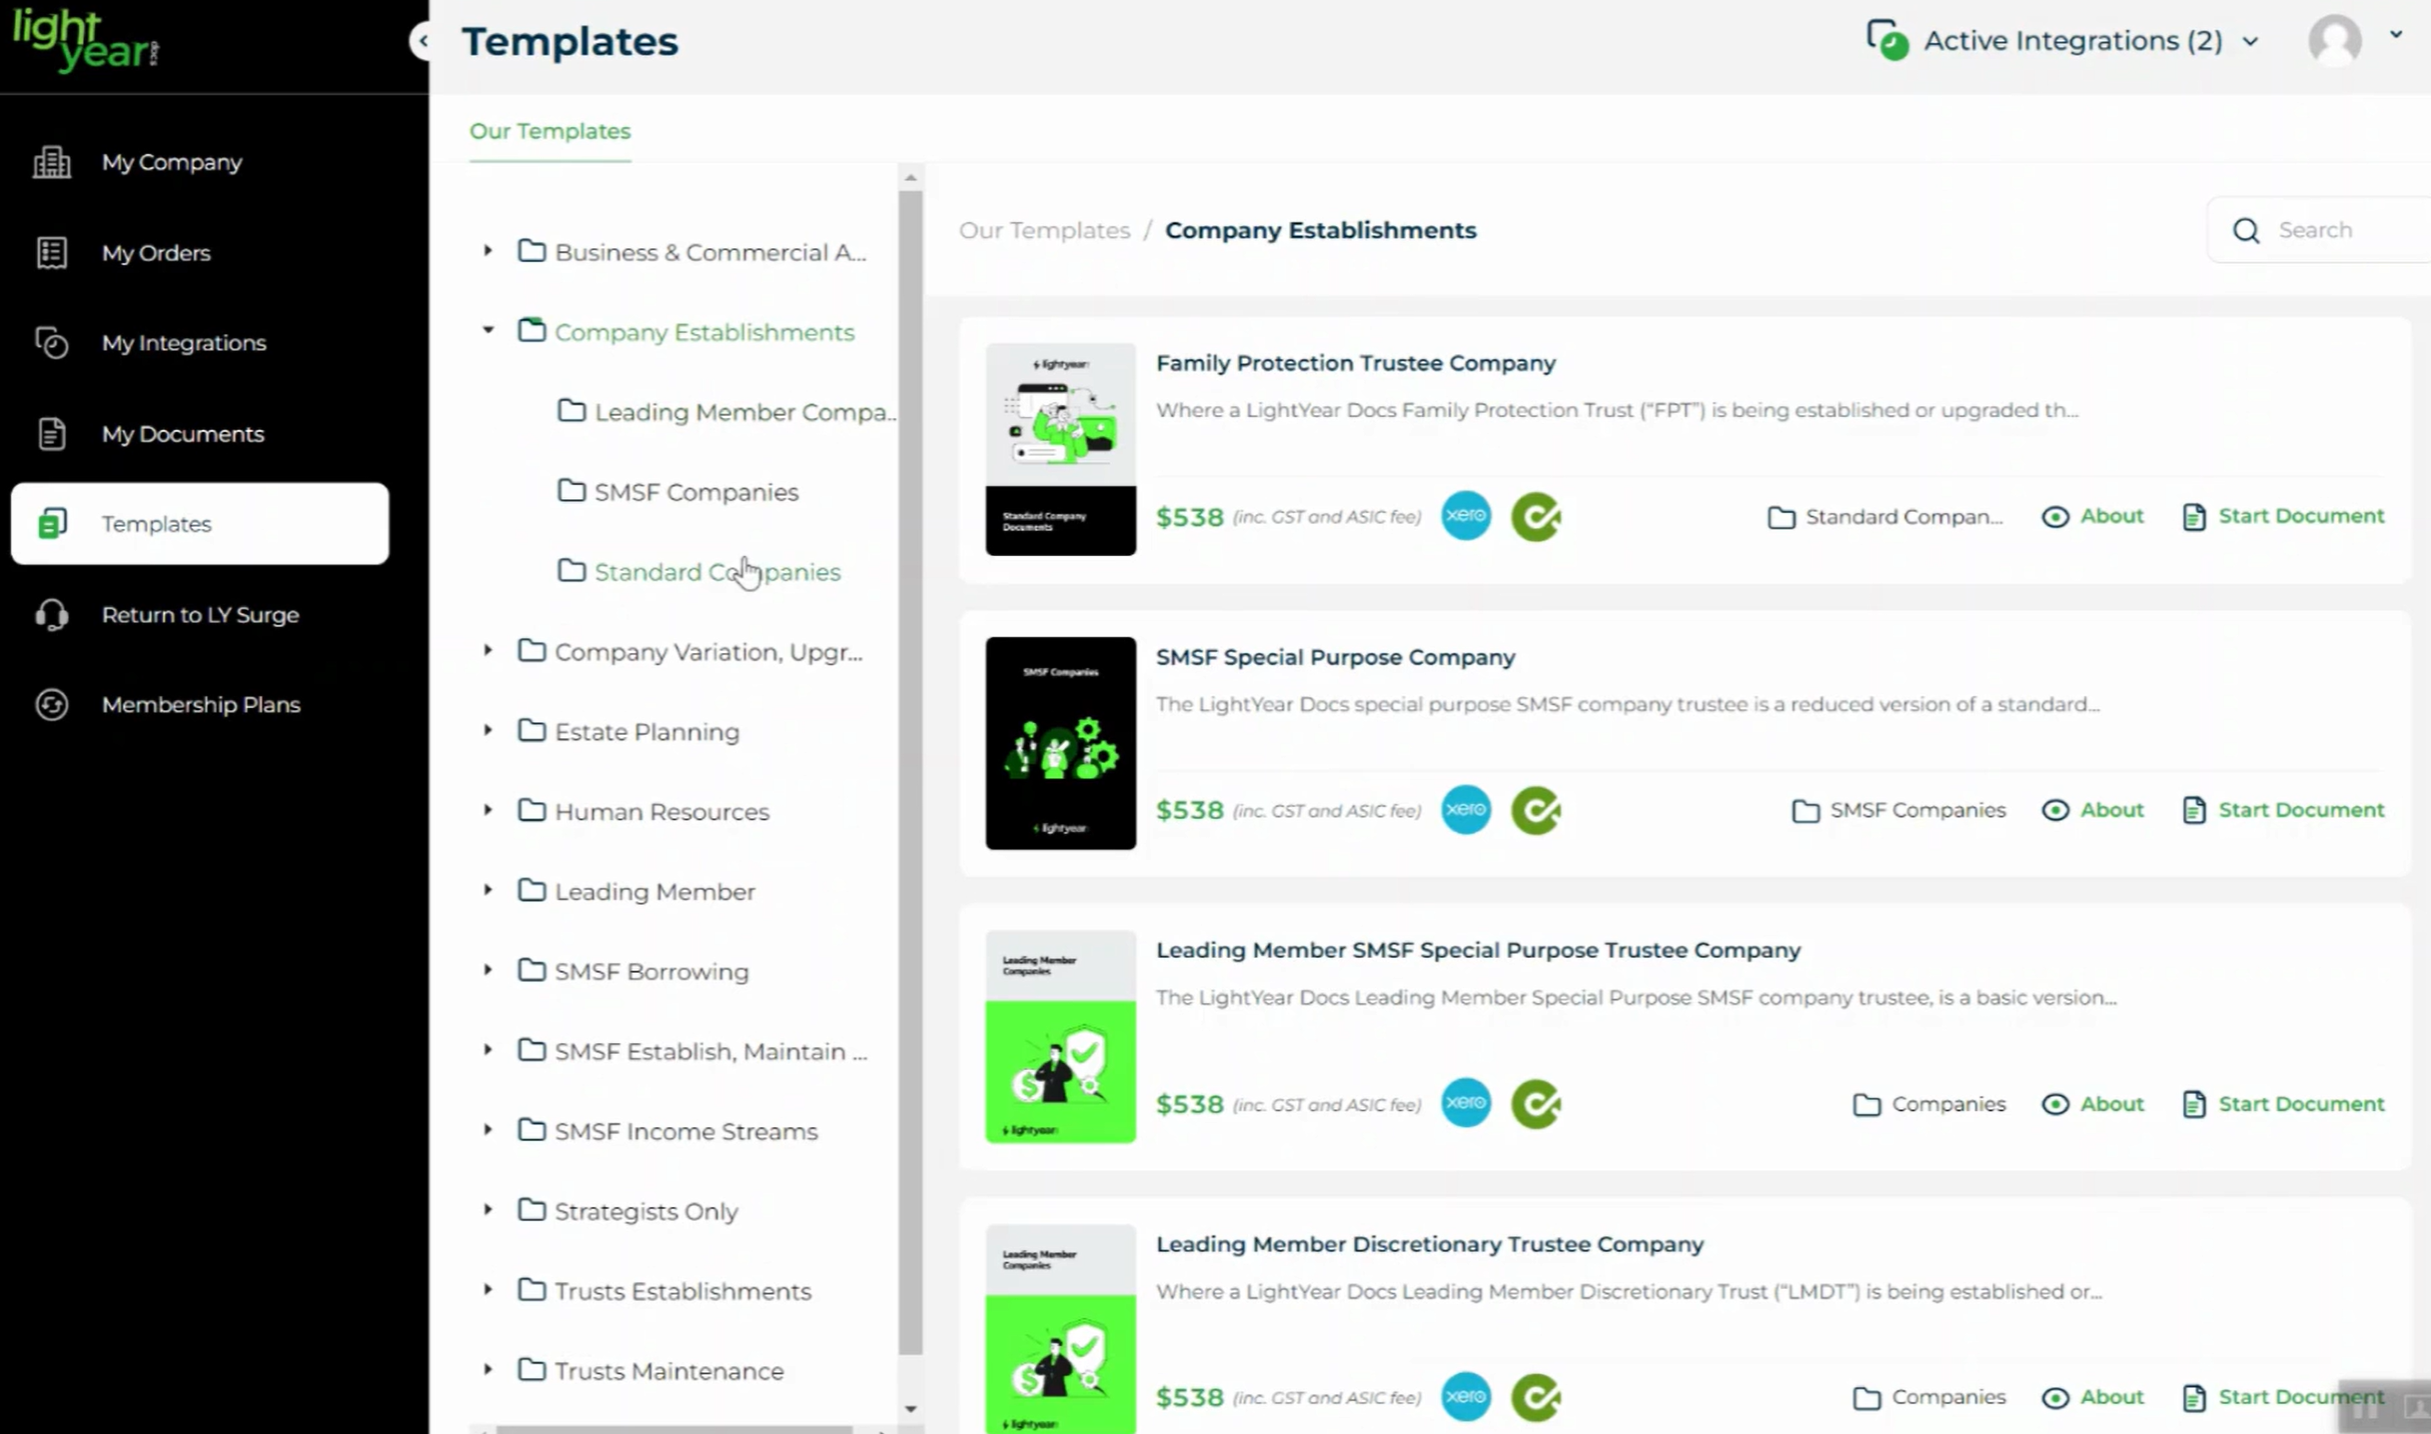
- You can hover over the 'about' section to see a preview of the document, it's General Information, FAQs and more. Once ready click on 'start document'.
- Everything is the same in the interview as per our normal documents, you will just see the import client button appear, which means it knows there is client data that can import over from an available API.
- Click on the Import Client button.
- See the article How to Import Data into an Interview from CAS 360 for more information.
- As we had originally selected on a Company document, it will automatically bring up the companies, search for the company name or scroll through them.
- You can view the data (general information, contacts and relationships) of the company to ensure it is the correct one, otherwise simply click on import.
- You will see all the information comes across into the correct format with all fields added.
- There is a copy function when adding in some areas, when filling out the Directors area, this is where the copy button comes in handy.
- Click on import client (select on sole director or 2+ directors)
- Click on the information to ensure the courser is blinking
- view client details and go to the relationships area and press on the copy sign
- CTRL + V will paste their information right across.
- The next few pages will show that you need to add an initial member, once you click on the import button, it already knows that it need to add an individual. Click on the radio button and import straight away or view the details.
- Once you have gone through and completed all areas using the Import button along the way, finally click on assemble document.
You can download as a PDF, order a hard copy, send it for signatures if using Fuse Sign or request legal review.
You can then access your document from the 'my documents' area in your document wizard.
Don't forget to always keep your data up to date in CAS 360.
Other Helpful Articles: