Parts and functionality of the Import Client pop-up
This article will identify the parts and functionalities of the import client pop-up.
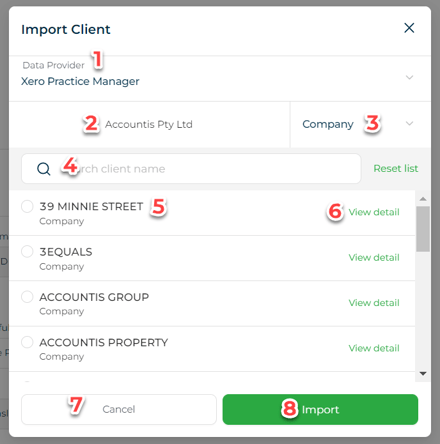
We are to explain the parts of the Xero Import Client pop-up individually for better understanding.

1. Data Provider - This is where you can change data provider once we add more. Currently, it is defaulted to Xero Practice Manager.
2. This shows the current XPM account where the data will be coming from. If you have multiple XPM accounts connected, there is a drop down option so you can switch accounts.
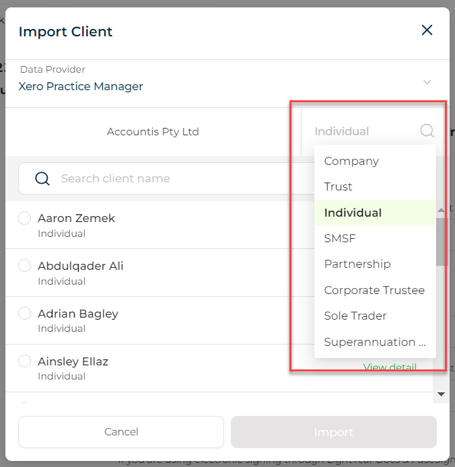
3. This is for the entity type. It is defaulted based on what you will answer from the interview ie. if you choose to answer a company, it will automatically appear as Company. If it is a trustee, it will change to Individual. You have the option to manually change, but we suggest to stick with the defaulted option.

4. Search bar for easy and faster searching.
5. List of client details saved in your XPM based on the chosen entity type.
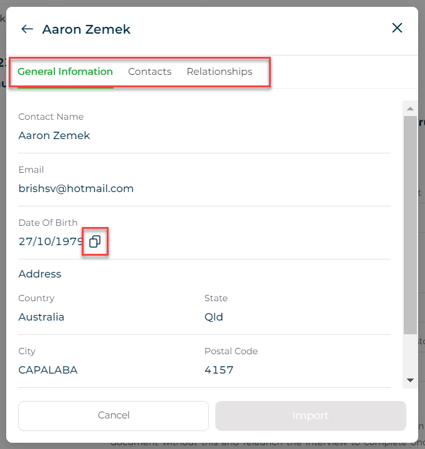
6. View detail will show you the General Information, Contacts and Relationships of the chosen client. Relevant details has the copy icon for you to just click it and paste it to the necessary field.

7. Cancel button to close the pop-up if not needed.
8. Import button to import the chosen client details to the interview field.
Need more help?
- Contact support through your Organisation Support chat in Surge
- View this training video - XPM and LYD Integration
