
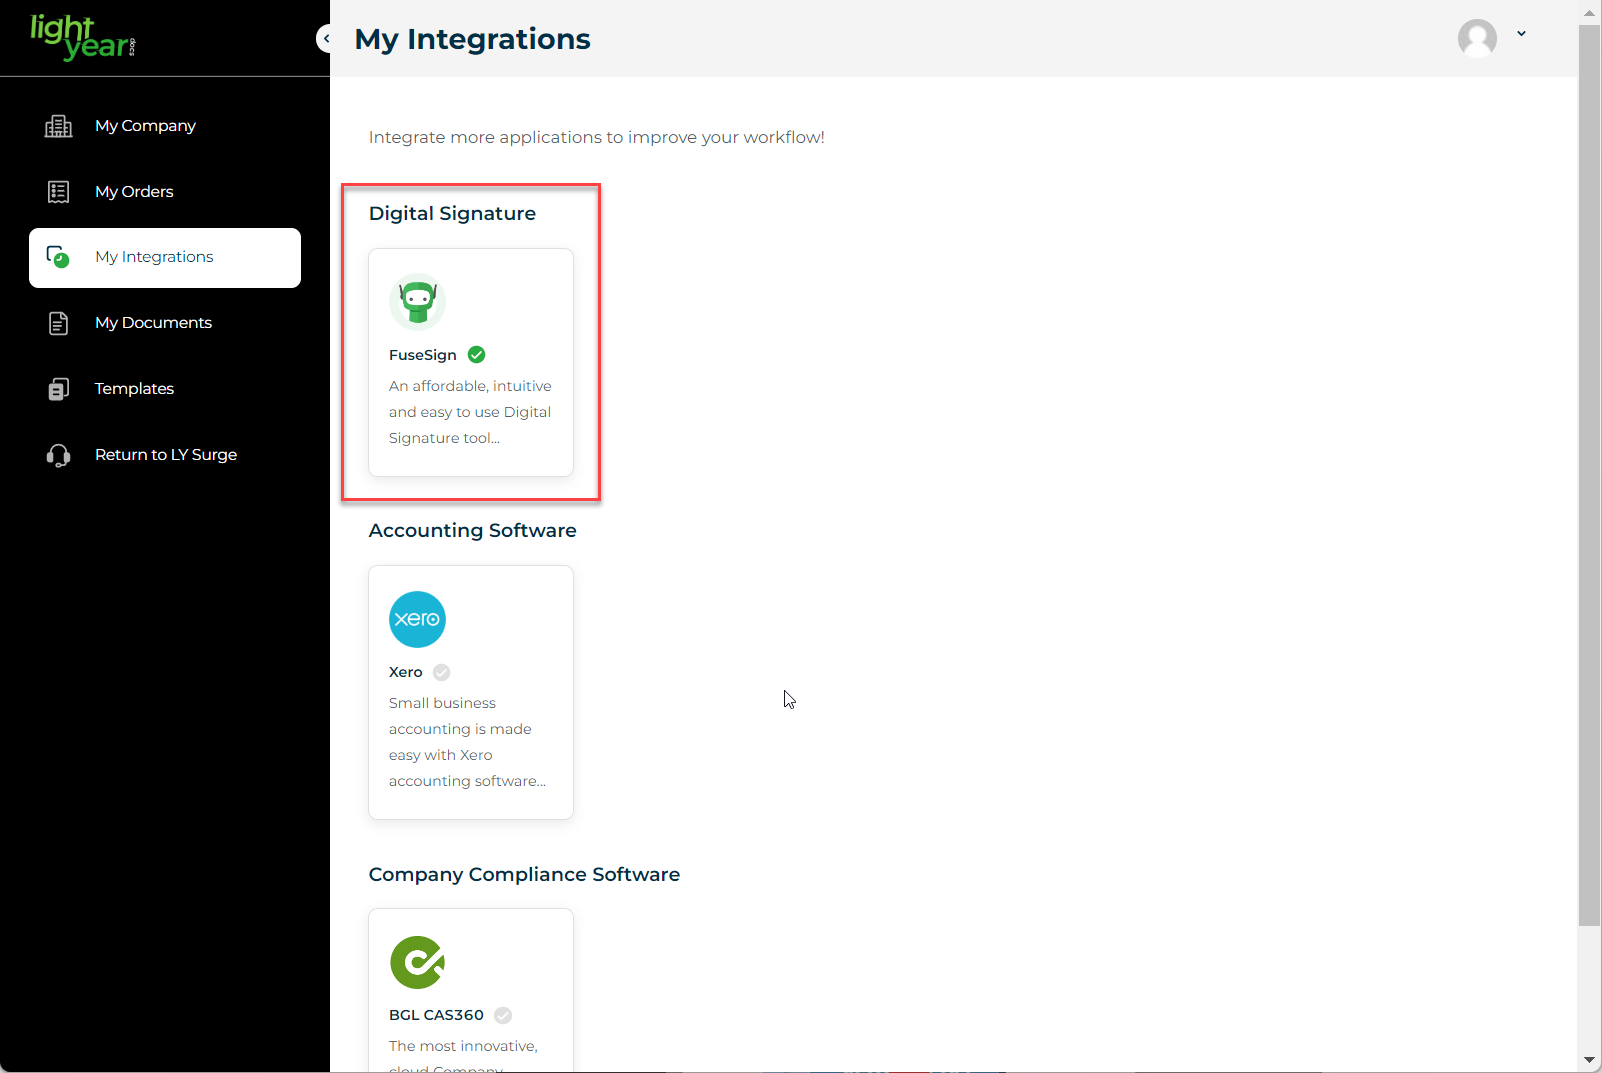
1. Make sure that your FuseSign account is connected.
2. Complete the interview. (Note: Not all documents are allowed for digital signing.) Once assembled, the complete pop-up will give you the option to send the document for signing.
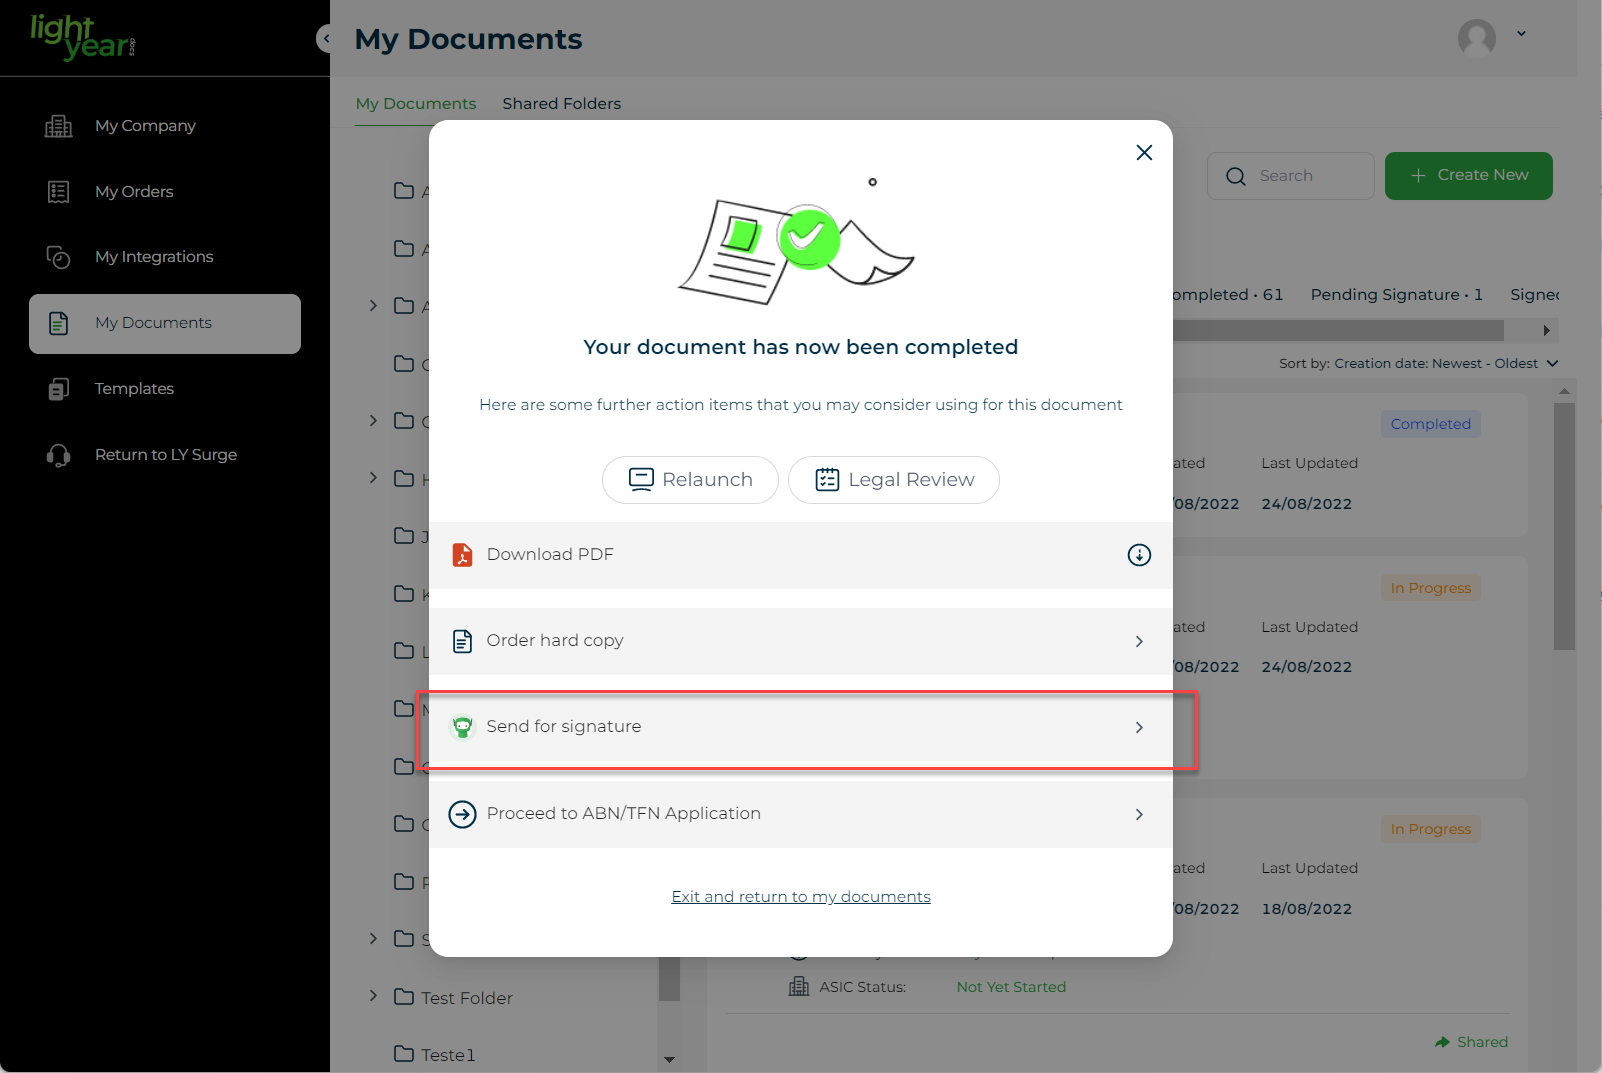
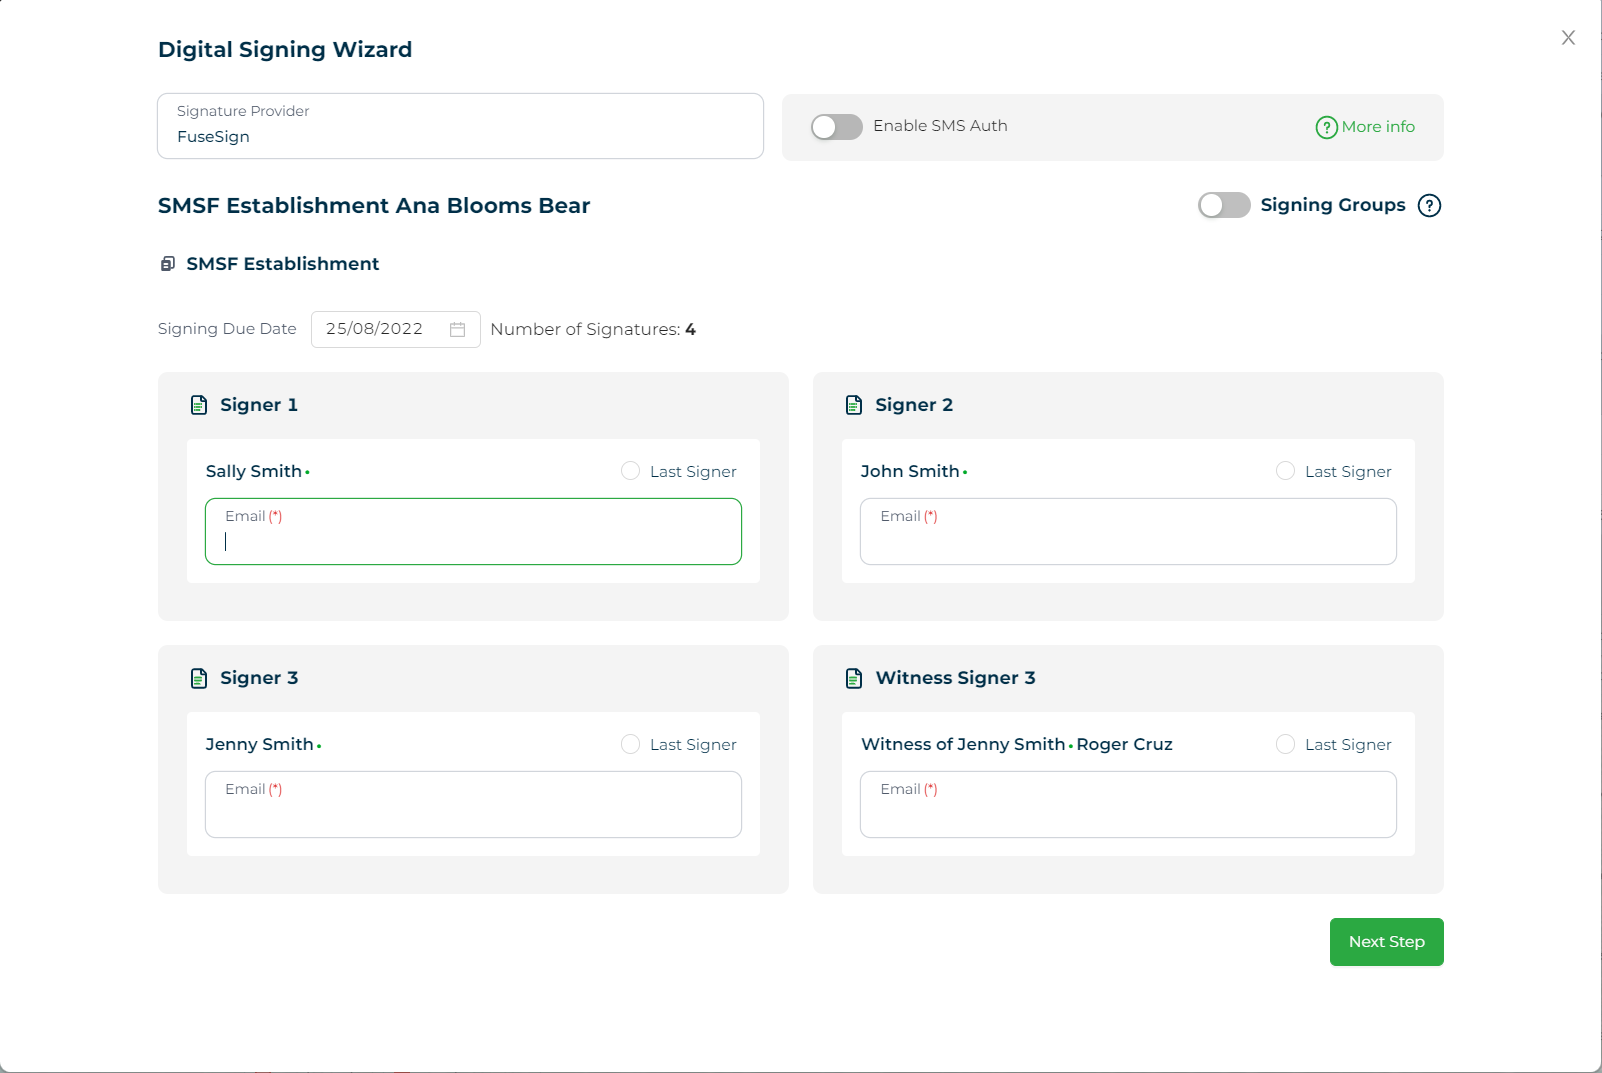
3. Once you click on Send for Signature, the Digital Signing Wizard page will show with all the signers. The following actions can be done:
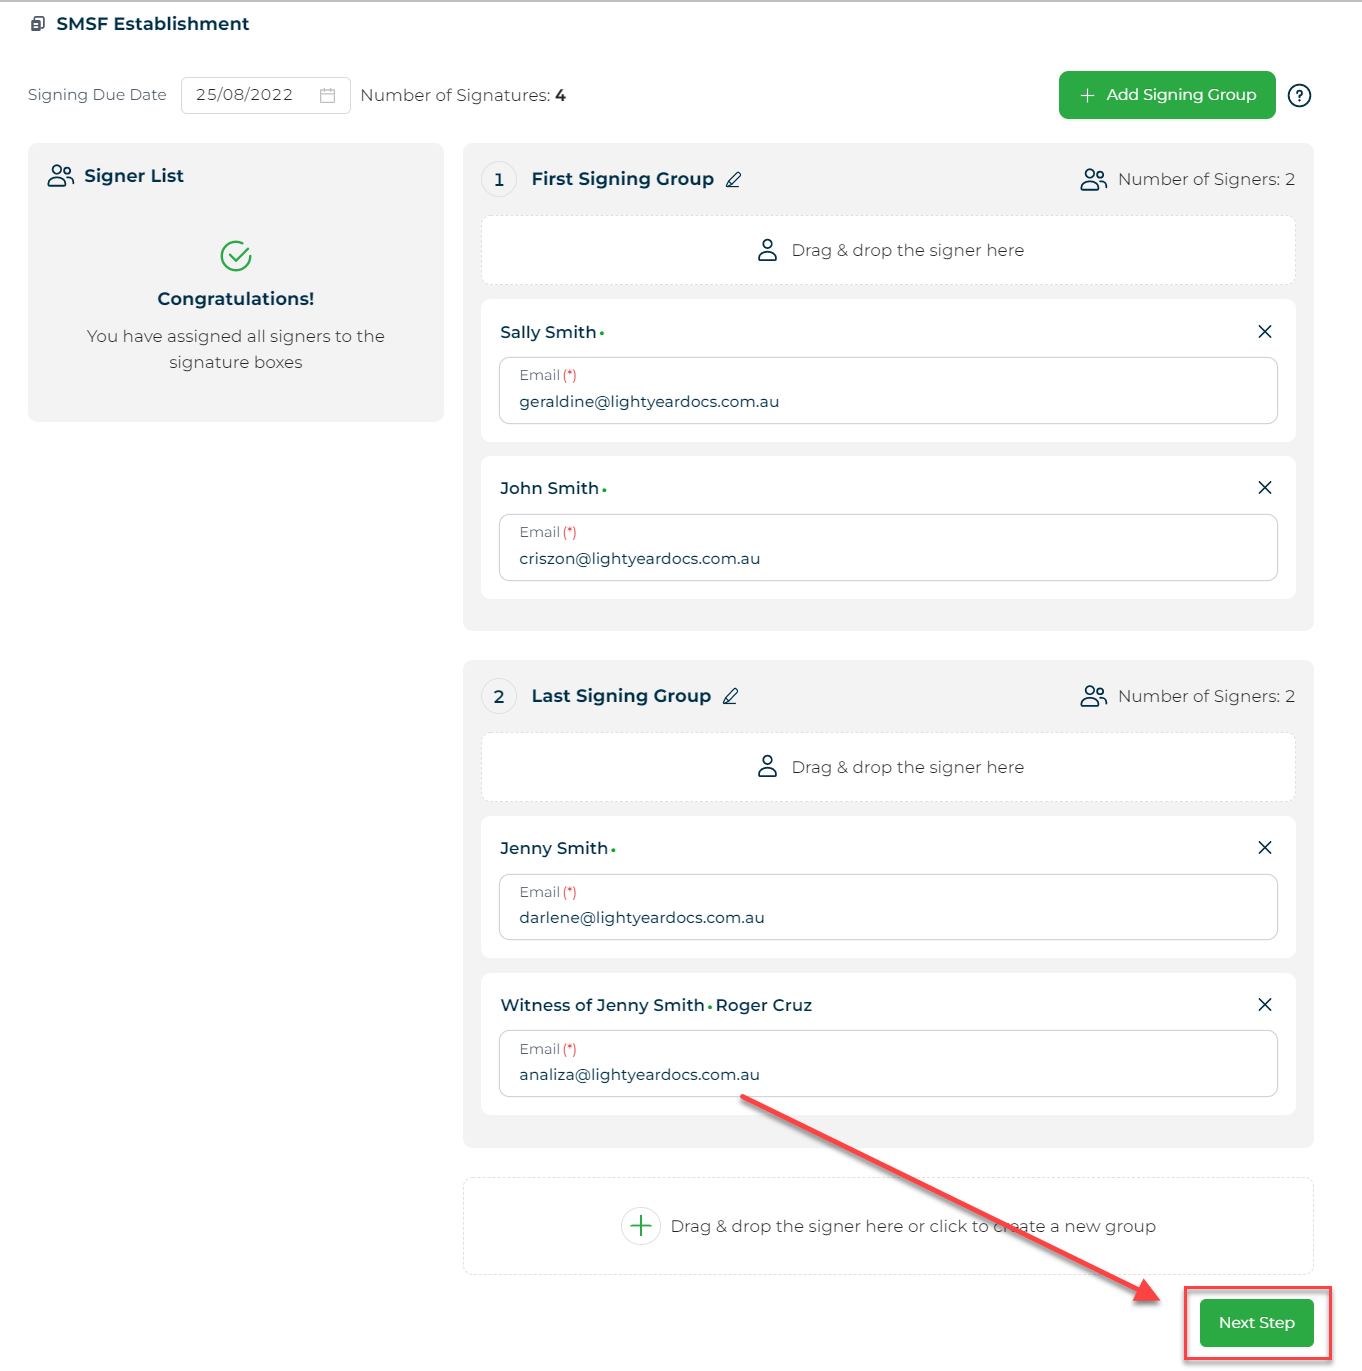
- You must add the signers' email addresses on the tab below their name.
- You can assign the last signer by ticking the Last Signer on the top right of their name.
- You can update the signing due date as it is defaulted to the day the signing request is created.
- You can also assign signers by group by ticking the Signing Groups button. This will allow you to assign signers in batches.
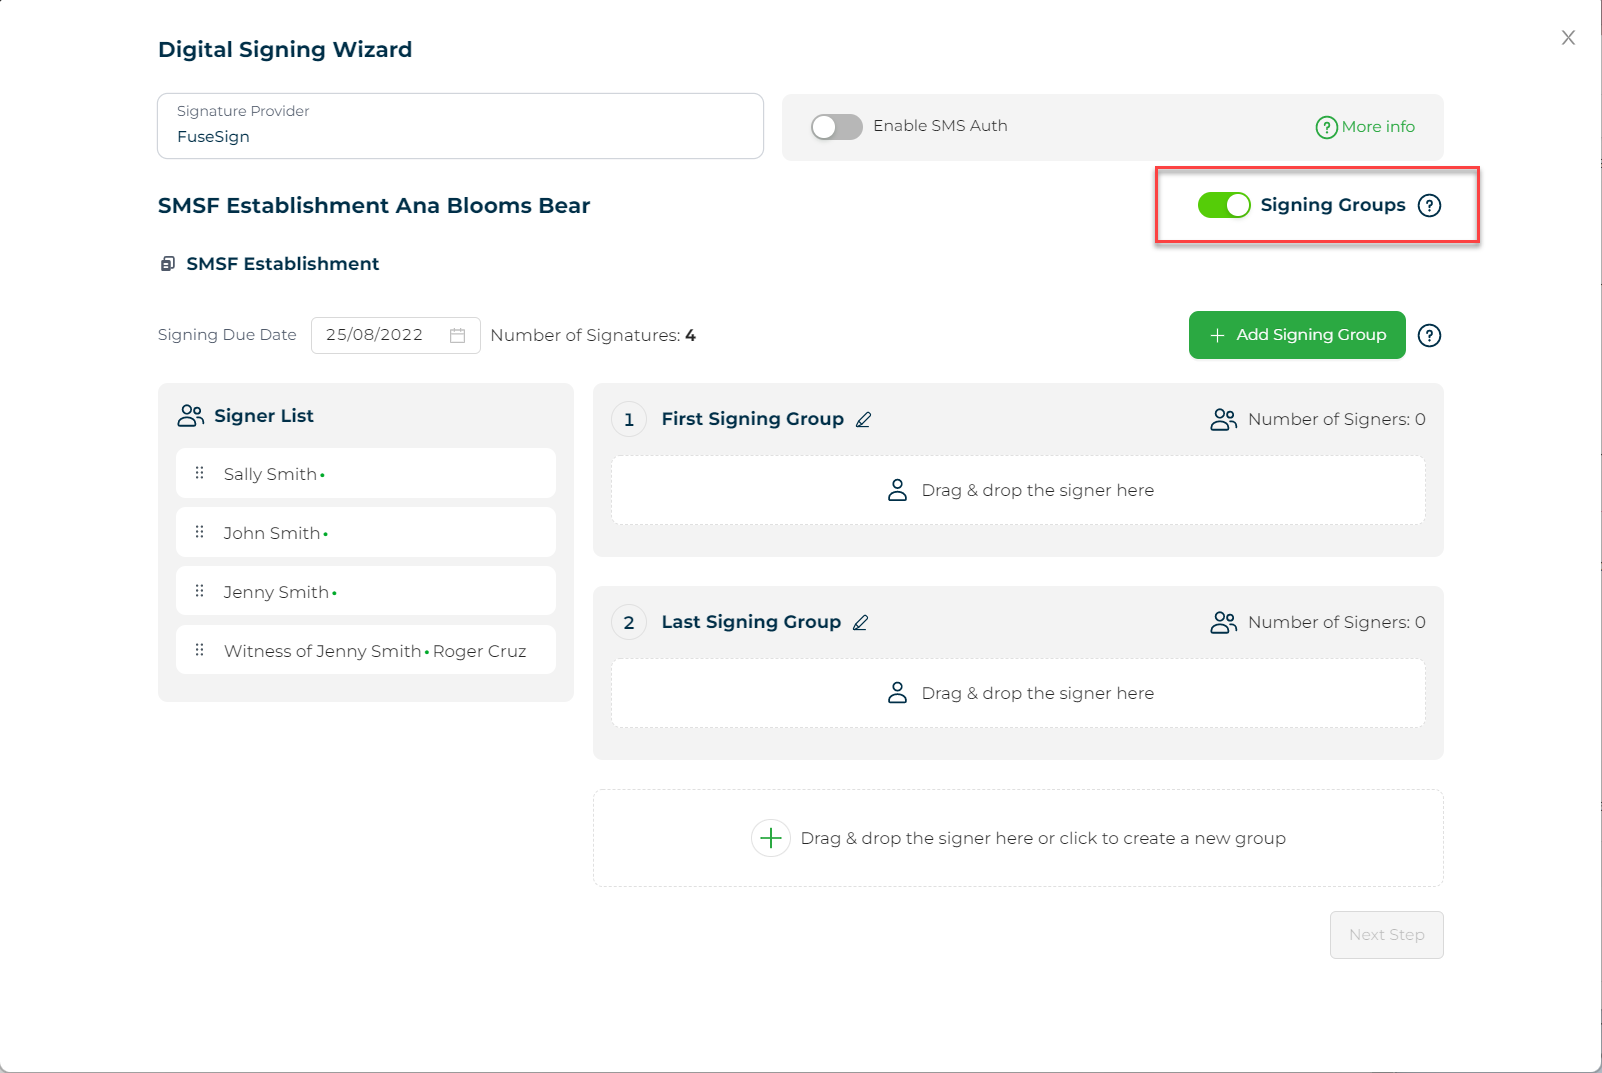
- You can add multiple signing group as you wish by clicking the Add Signing Group button.
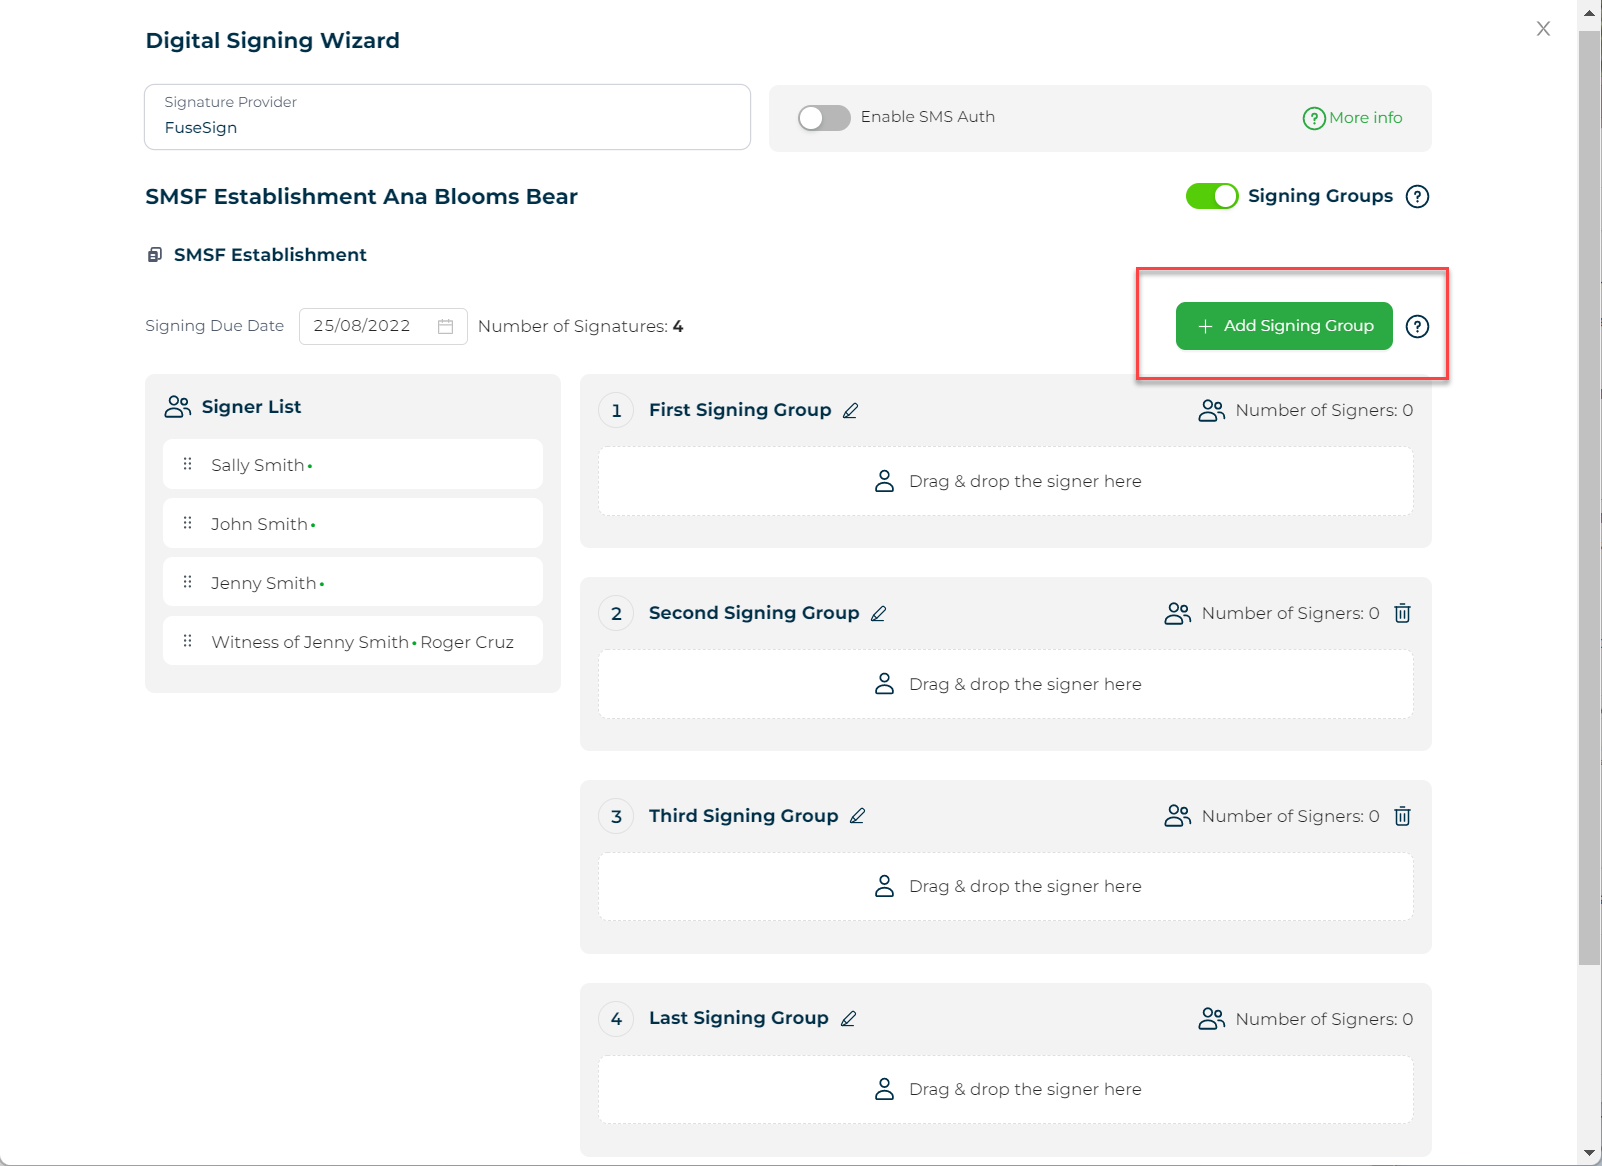
Then, you just have to drag the signers name from the left going to the right on which group you want them to sign. Then you have to add their email addresses respectively.
4. Once the signers are complete with their email addresses, you can now click on the Next Step button found at the bottom of the page.
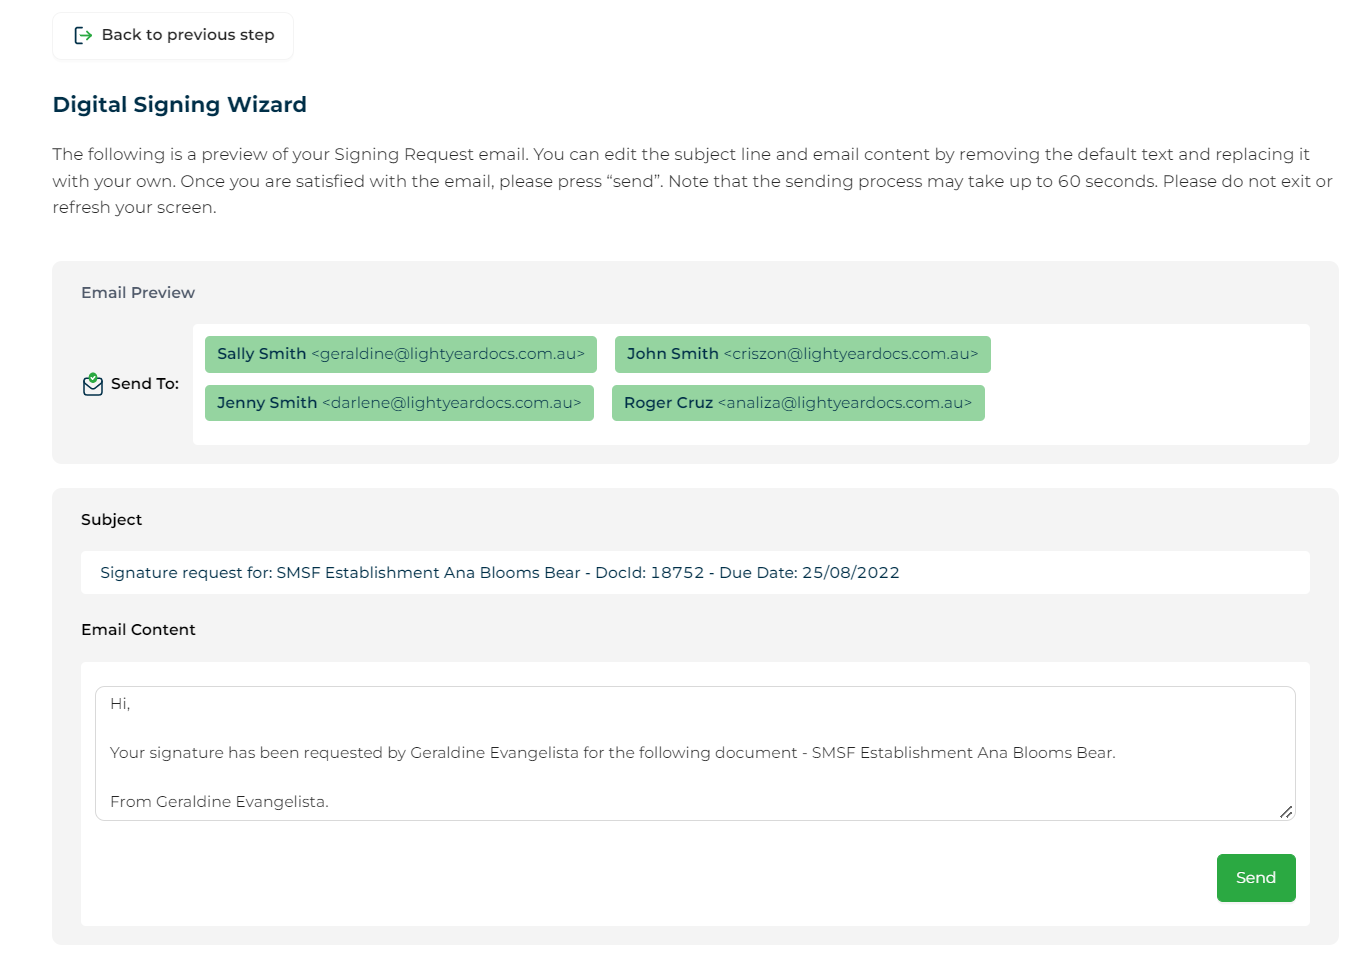
5. It will then bring you to the Send Email page. You have the option to customise the email content. If everything is good with the email, you can go ahead and click on the Send button. Make sure you have enough credits on your FuseSign account to send the email out.
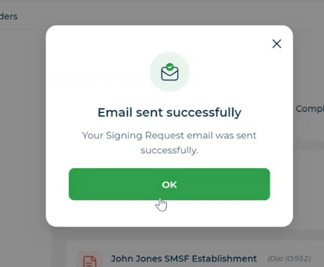
6. It takes about a minute for the email to be sent out and you'll receive a pop-up once the email is sent successfully. And it will bring you back to your My Documents.
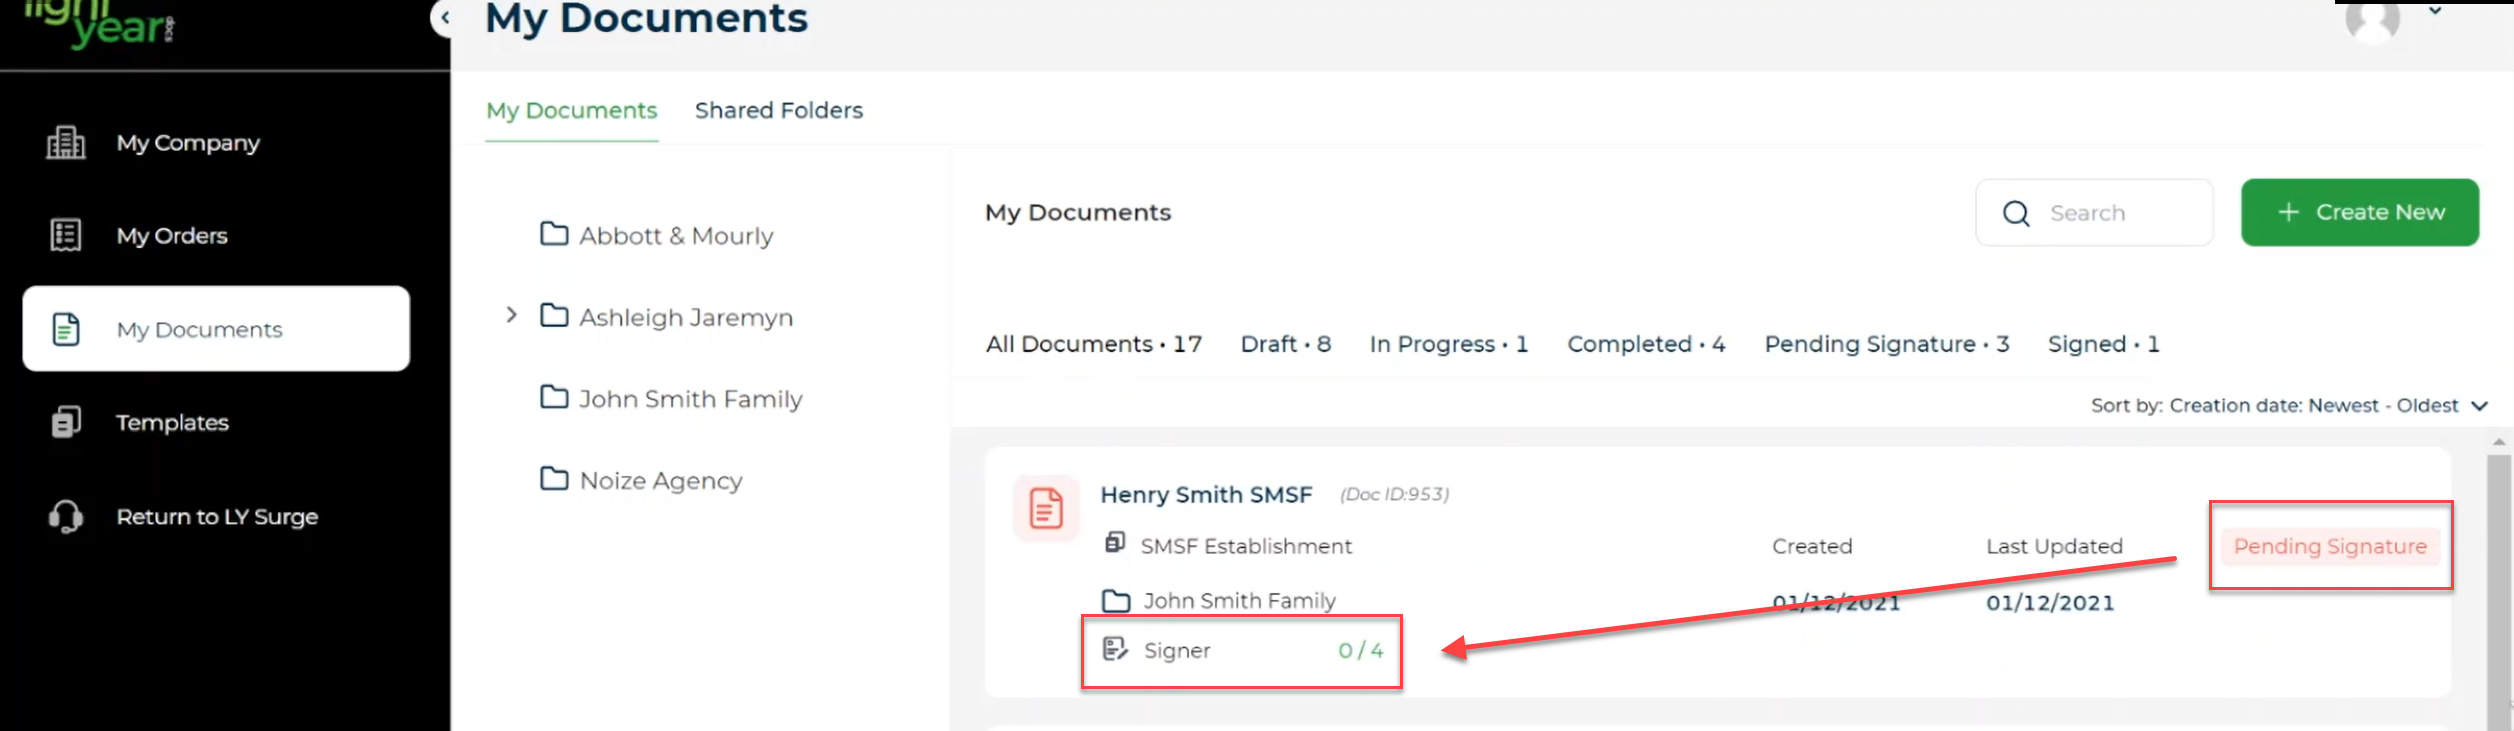
7. On your My Documents, you will see your document on Pending Signature status and it will show you the count of signers. It will change as soon as the signers starts signing the document.
8. This is how it would show once received on the signer's email. The sender will be the company name that is associated to the FuseSign account.
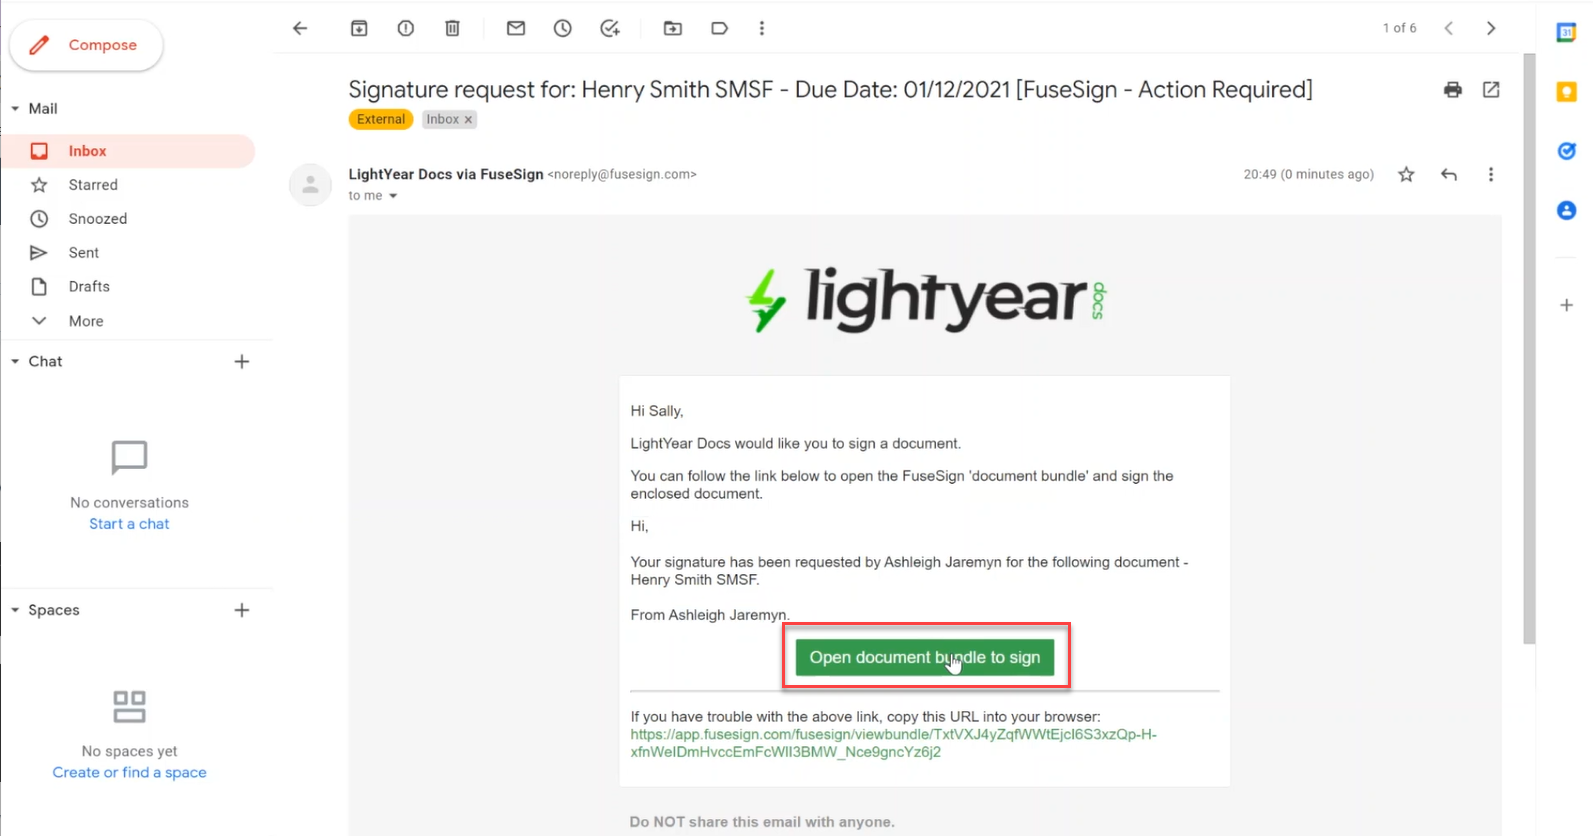
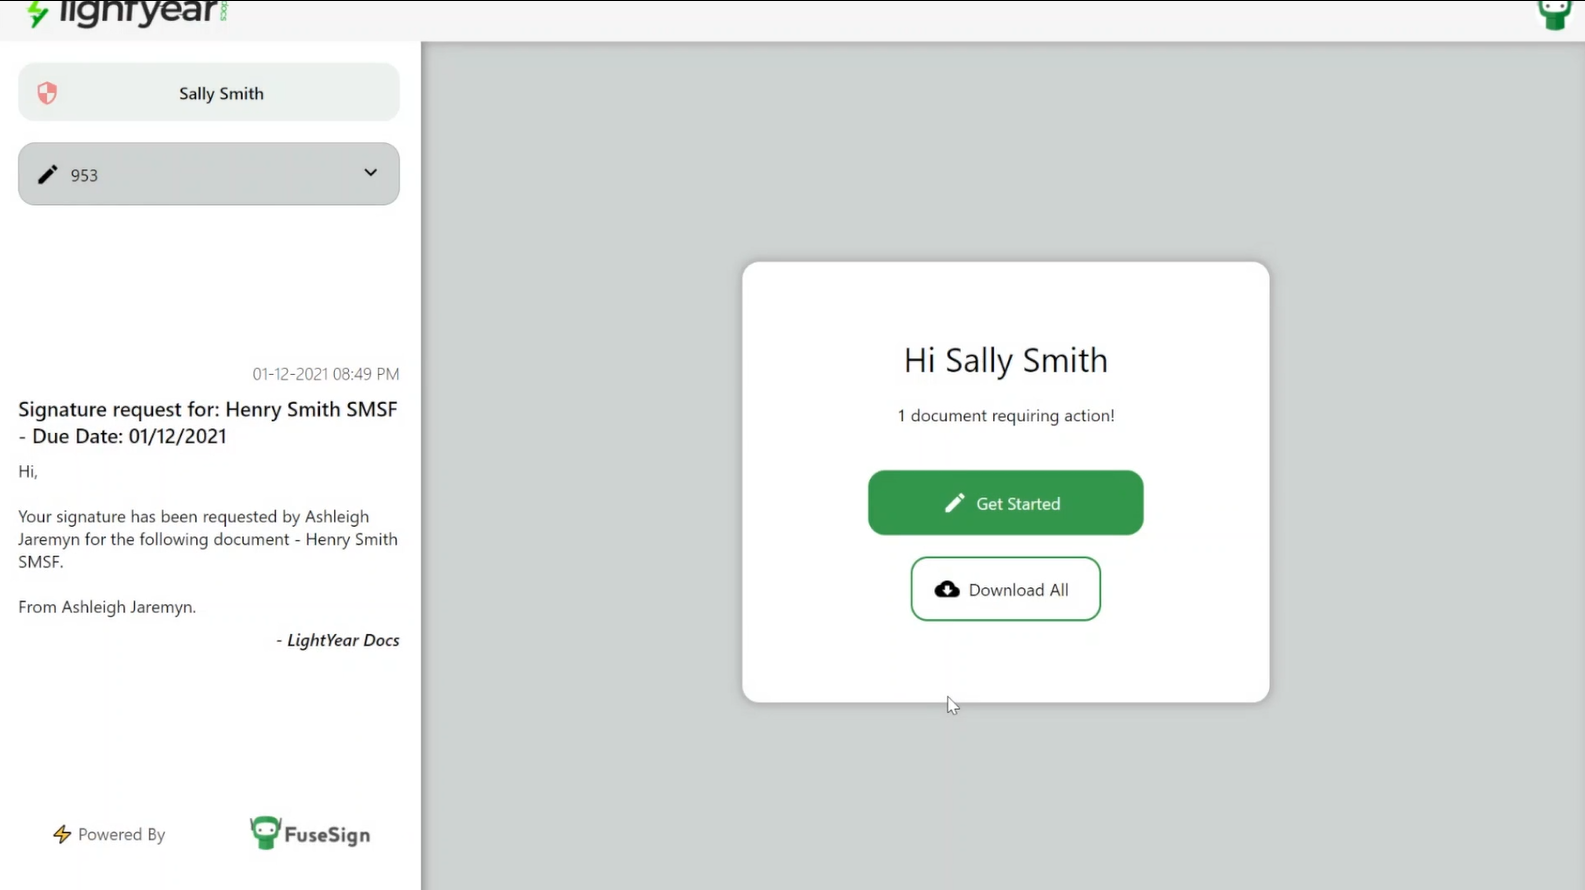
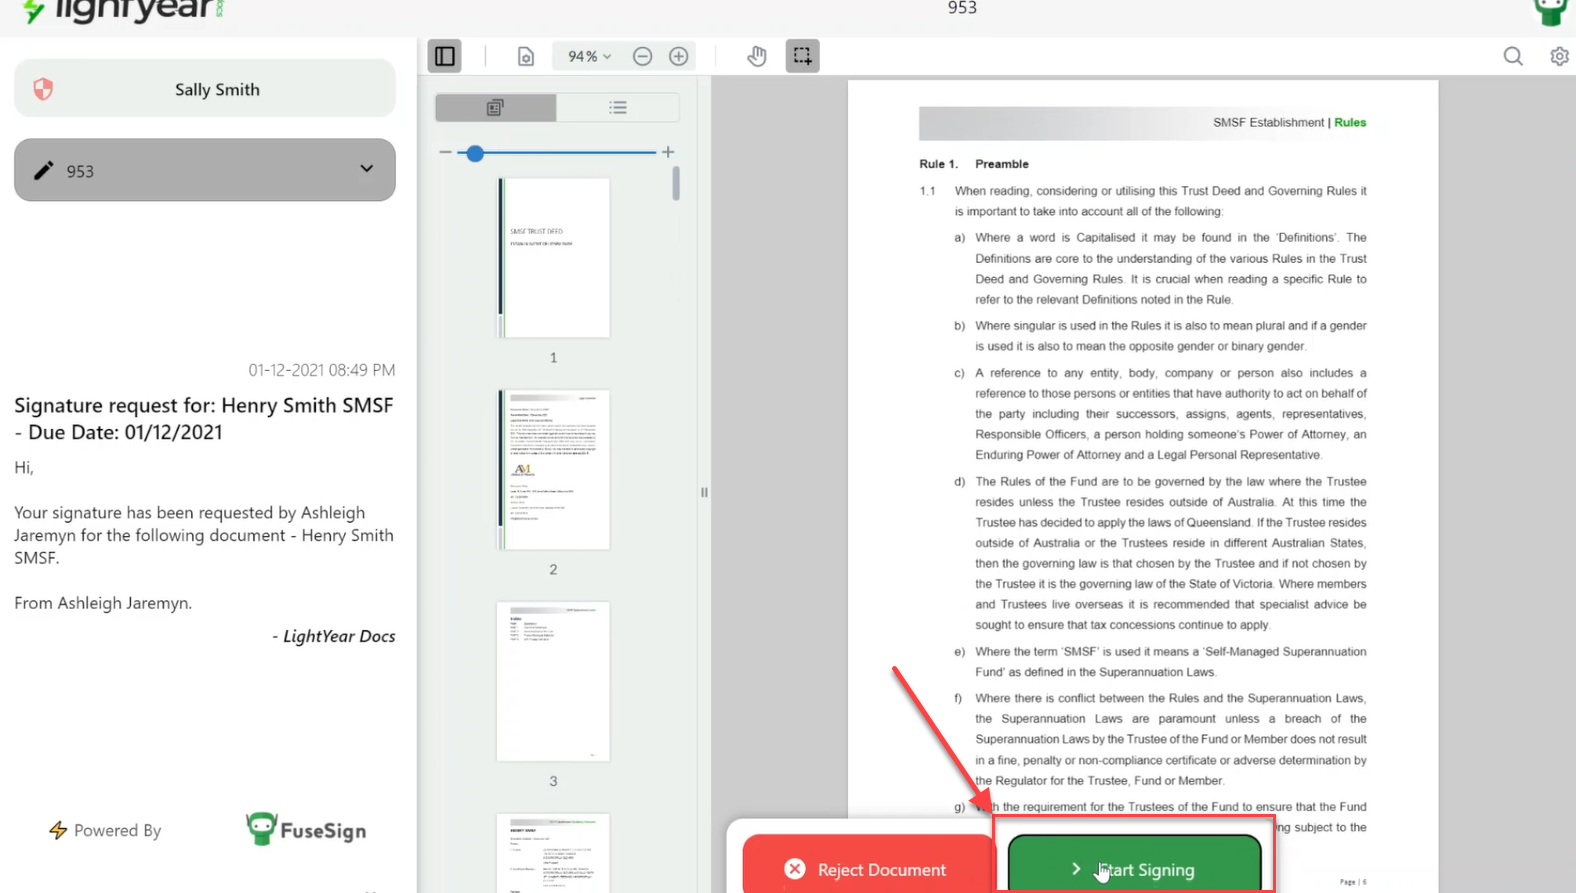
9. Once the Open document bundle to sign button is clicked, it will direct you to the document to be signed. Click on Get Started and you'll be able to preview the document.
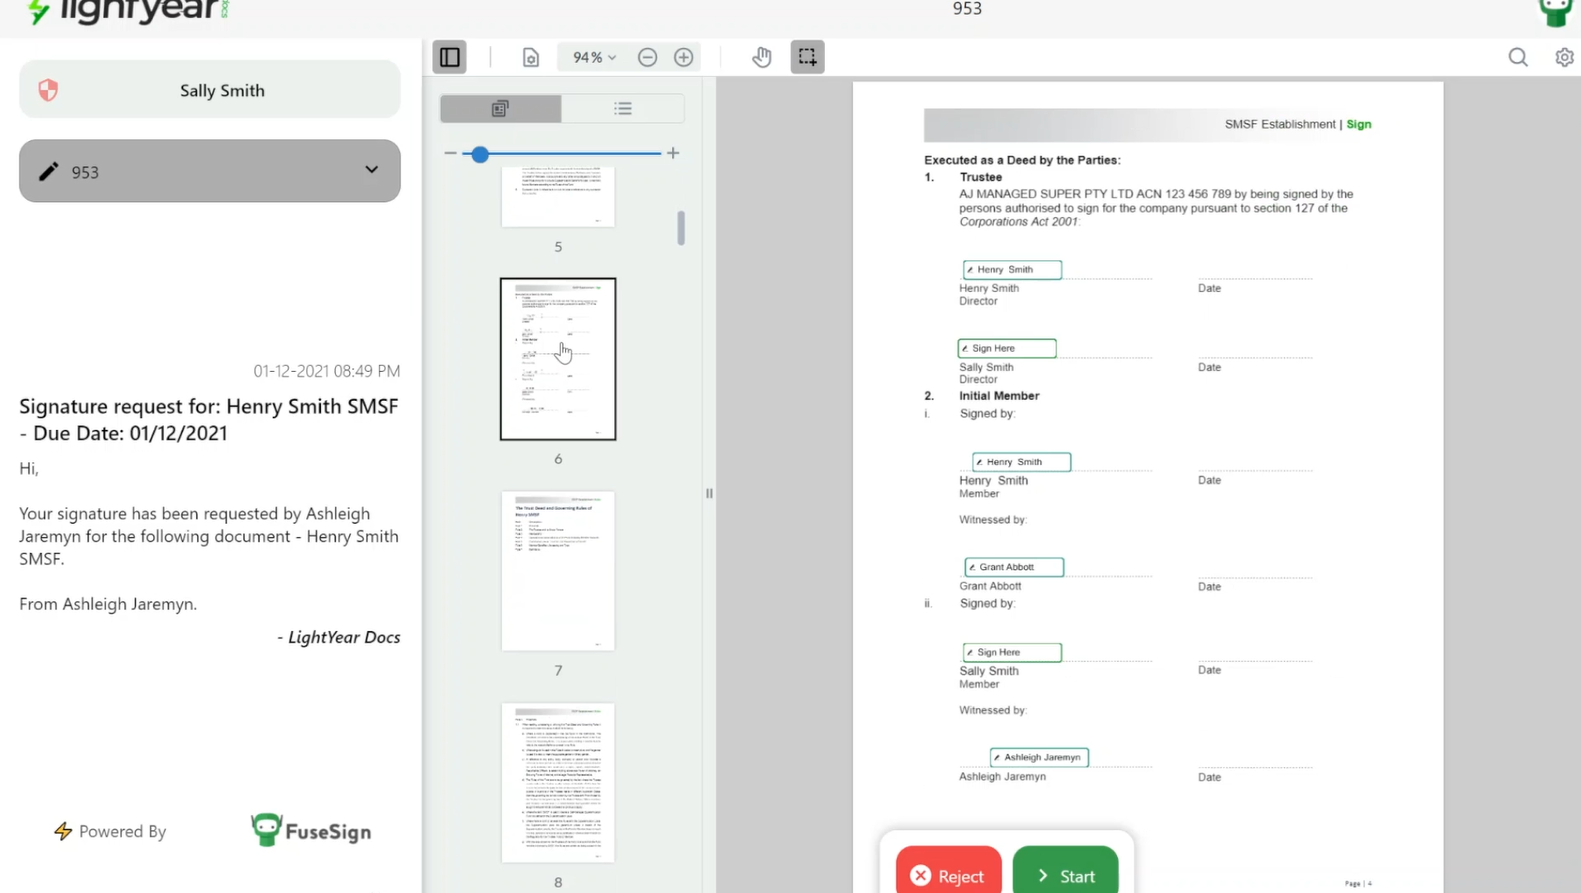
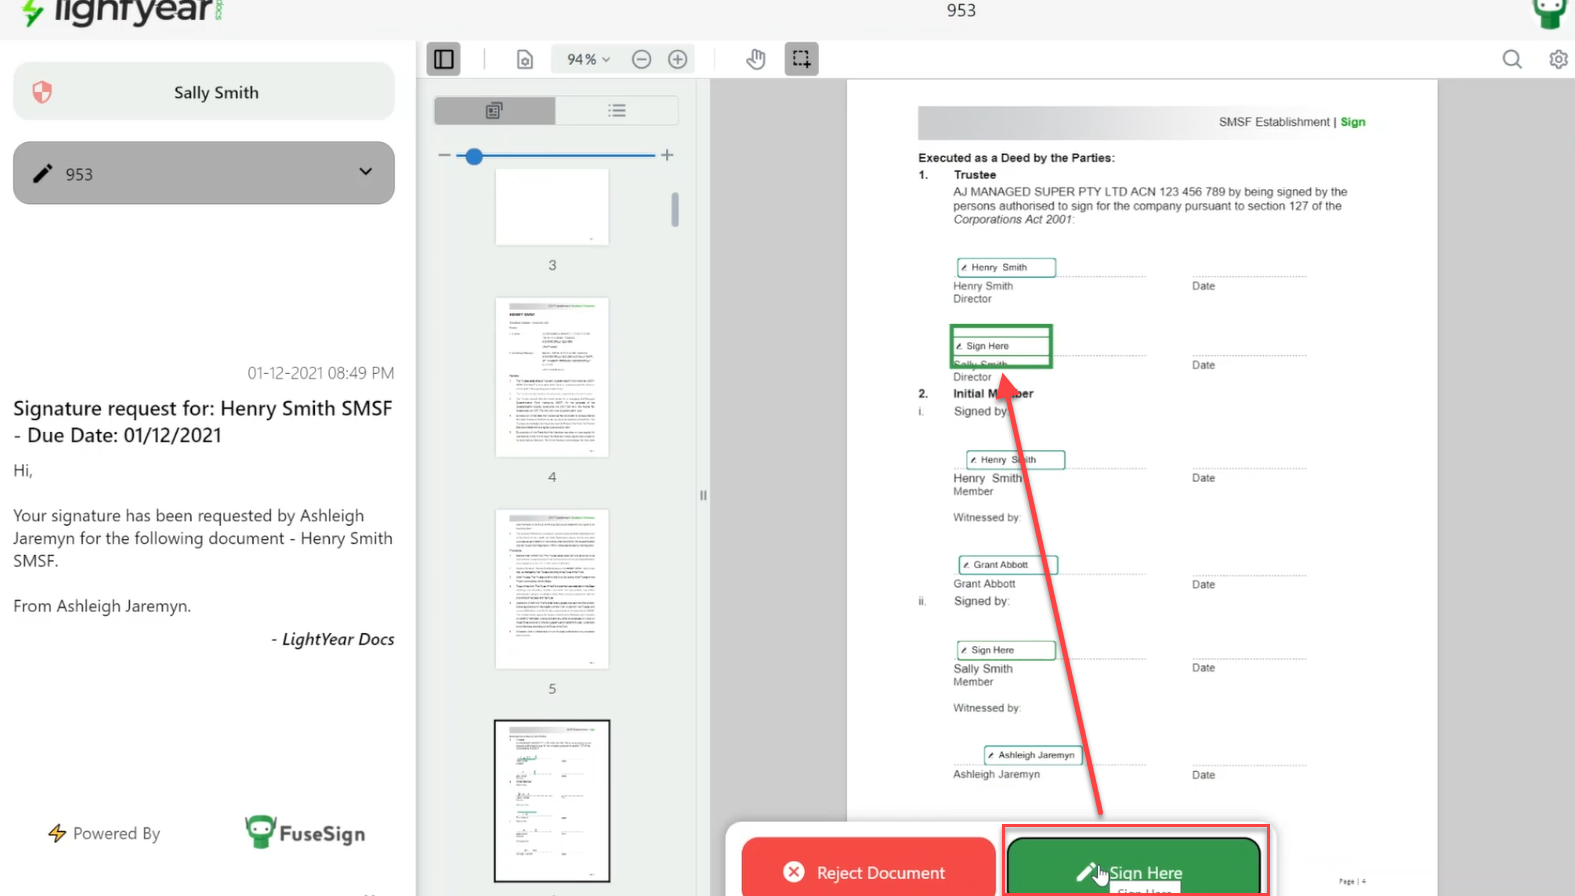
10. When you are ready to sign, yo can click on the Start Button, then it will bring you to the signing page and you can now click on the Sign Here button. It will only allow you to sign where you are required to sign.
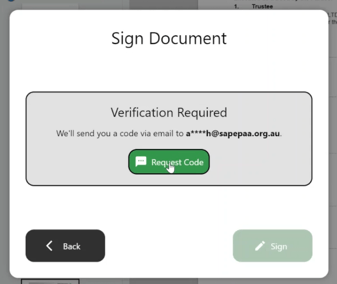
11. Before it allows you to sign, it will ask you for a code first that will be sent through your email.
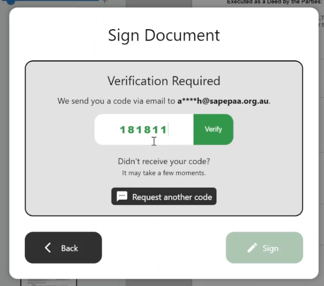
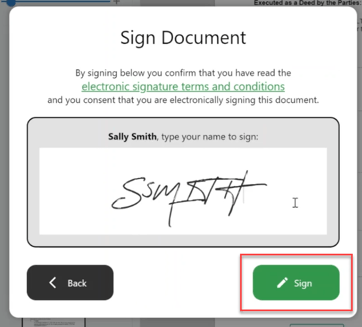
12. After putting in the code, click on the Verify button and it will direct you to the signing tab. After signing, click on the Sign button. It will bring you to the next signing page if you're needed to sign multiple times.
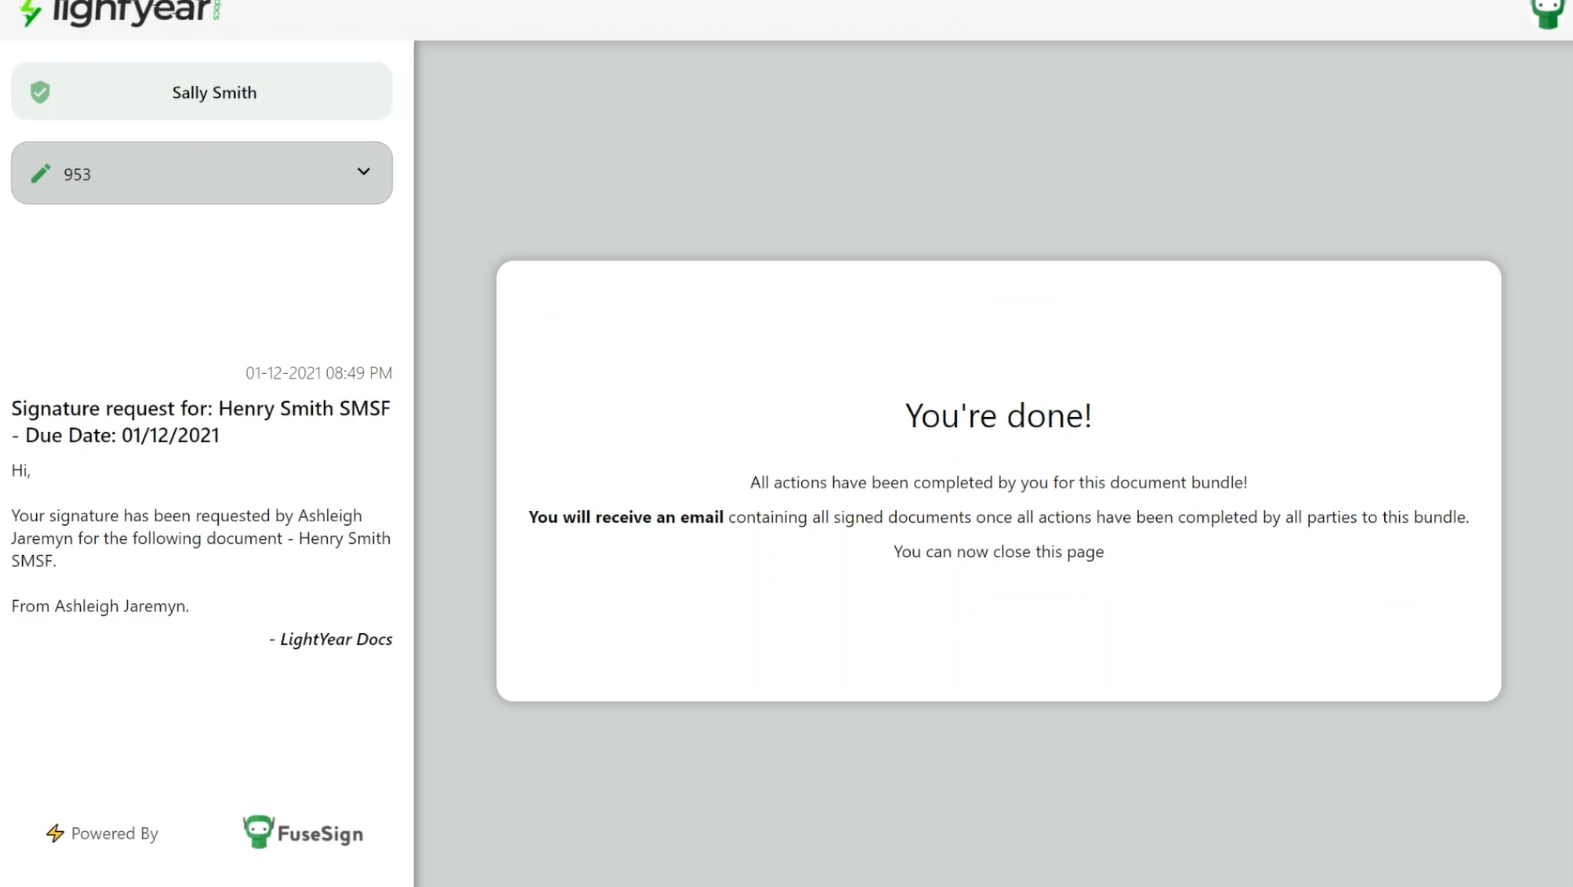
13. When you're done signing, you will now route to You're Done page.
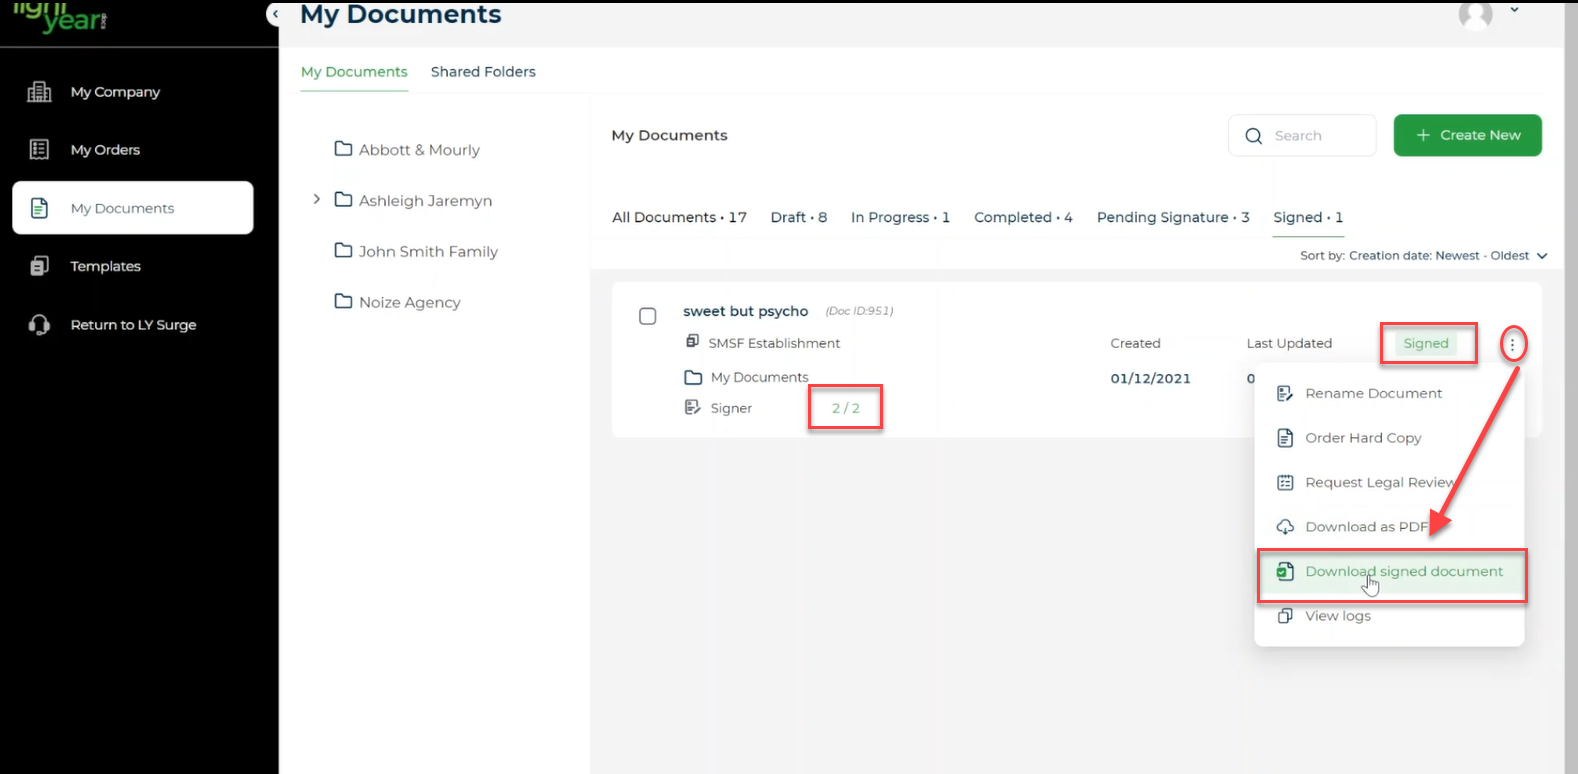
14. Once all the signers have signed, you can go back to your document. It will show you the total number signed, the document's status changed to SIGNED and you can now download the signed document from the Action button. And you're all done!
Need more help?
- Contact support through your Organisation Support chat in Surge
- View this training video - FuseSign and LYD Integration
Last Reviewed: 08/04/2025
Last Updated: 08/04/2025